How to Use SQL Server 2008 in Visual Studio 2010
SQL Server is Microsoft's database product and a fairly well-known one. SQL Server 2000 was especially popular with users and widely recognized, and SQL Server 2008 is one of its successors. Let's get straight to it (this post does not cover installing VS or SQL Server; it assumes the environment is already set up).
First, go to View -> Other Windows -> Server Explorer in the menu. This opens a small floating window that looks like this:
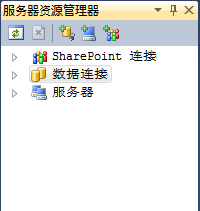
Right-click the Data Connections node and choose Create New SQL Server Database. The following dialog appears:
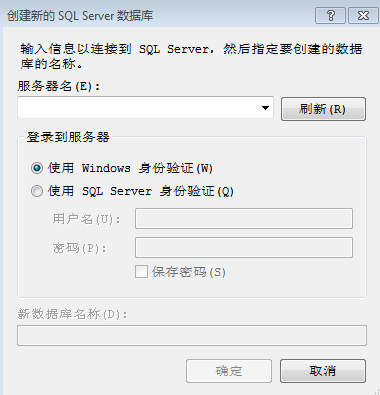
Click Refresh, then pick a server from the drop-down on the left. If none shows up, the local server side has not been started (assuming your machine is offline). Large, highly stable databases like this usually have a server process that listens for connections and applies data changes internally. In effect, the database's logical schema and internal schema live on the server side (much like an Apache server doing its work on the server).
If the server is not running, start the service. This is the same idea as running service mysqld start for MySQL on Linux. On Windows, find Services in the Start menu (on Win7 it is under Administrative Tools), or type services.msc at the command line. In the Services window, find SQL Server (SQLEXPRESS),
SQL Server Browser, and SQL Server VSS Writer, and start them. Go back to the dialog above, click Refresh, and open the drop-down again: you should now see the server name, which means the server side is up and ready for connections.
After selecting the server above, enter a name for the new database and click OK to create it.
Once the database is created, connect to it.
Again, right-click the Data Connections node and choose Add Connection. A Choose Data Source dialog appears:
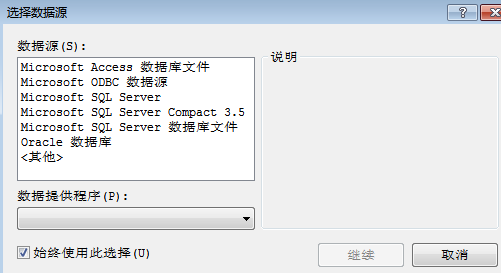
Select Microsoft SQL Server and click Continue. An Add Connection dialog then appears:
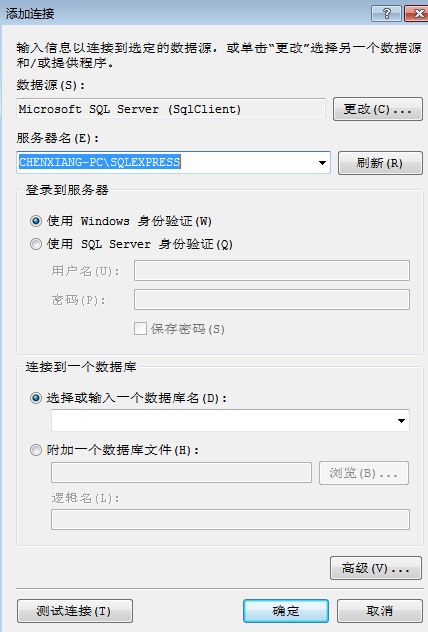
The server name is the one that became available after starting the service; you can see it in the drop-down. For the database name, enter the database you just created, or pick your database from the drop-down. Before confirming, you can click Test Connection to verify it, then click OK.
Actually, you don't need to create a new database before choosing a database name in Add Connection. In the Add Connection dialog, just pick any other database for the database name field and log in to the database system. Once logged in, run create database XXX; in the query pane to create a database, where XXX is the database name. To delete/destroy it, run drop database XXX; to drop the XXX database.
In Server Explorer, you can see the new database listed under Data Connections:
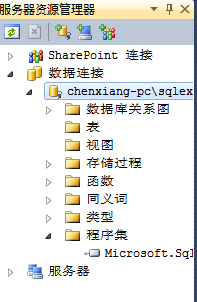
Under Data Connections in the explorer, right-click the database. The context menu has many entries; choose New Query and you can operate on the database using SQL.
To close the database connection, right-click the database name again and click Close Connection.